By Ashley Peele
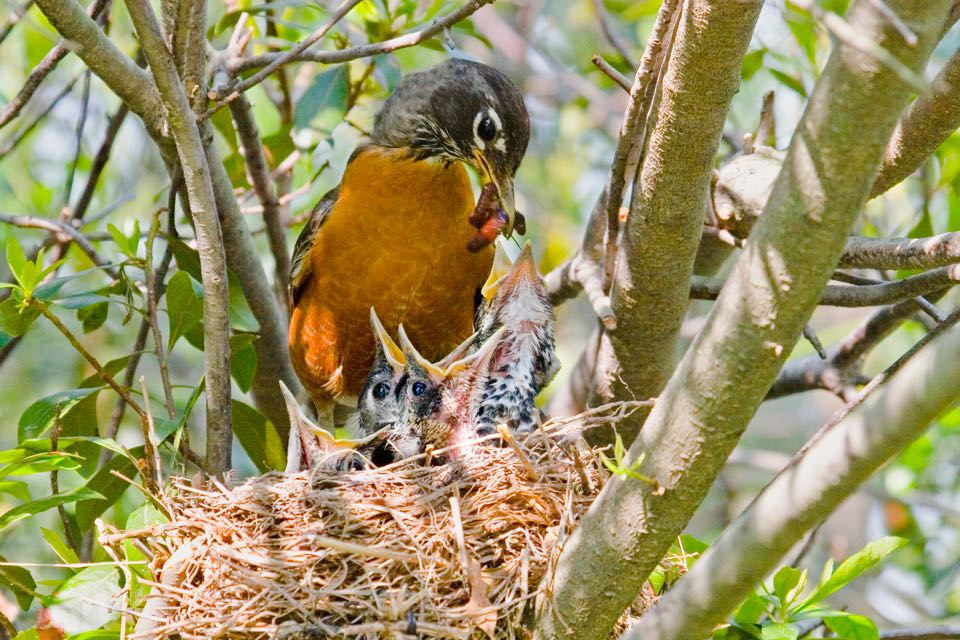
American Robin at Nest with Babies at Glen Allen (CO Bob Schamerhorn)
Atlas Data Entry Round 1: Incidental Observations*
We will be posting a series of tutorials walking you through the process for submitting your bird observations for the second Virginia Breeding Bird Atlas.
For this first article, we will assume that you noticed an adult and juvenile Bald Eagle at a nest. In general, we recommend always submitting a complete checklist (see handbook for full details), but for now let’s keep it simple and enter this one incidental observation.
Here we provide both a short explanation for more experienced eBird users and longer explanation for those new to the world of eBird.
Summary for Incidental Atlas Observations:
- Go to the VA Atlas eBird portal at https://ebird.org/atlasva/home
- Log in with your existing eBird account or create one if you are a first-time eBird user. If you are an existing eBird user, please do not create a new eBird account just for atlasing!
- Click “Submit Observations” at top.
- Enter and then select the block or county name in the field under “Find it on a Map”.
- Zoom in as far as possible and precisely plot the point of your observation, giving the location whatever name you wish. Click Continue.
- Enter the date of observation and select “Incidental” as the observation type, assuming you are reporting only the eagles and not a complete list of other birds seen on the same outing. Click Continue.
- Enter the number of birds seen (in this case, 2 Bald Eagles) and then click “Add Breeding Code or Details” to choose the correct breeding code (in this case, ON Confirmed – Occupied Nest). Add comments or links to photos in the Details field when available. Click Submit.
- Review your submission for accuracy and make edits as needed. Otherwise, that’s it!
Note: These steps only specifically apply to Incidental observation types entered through the eBird Atlas portal. Submitting checklists that include all species seen while actively atlasing is recommended, and will involve slightly different steps to be highlighted in another feature at a later date. For a detailed overview of the steps summarized above, continue reading the long version below.
Detailed Instructions for Incidental Atlas Observations
- Make sure you are on the Atlas eBird website (which, if you are reading this online, you are). https://ebird.org/atlasva/home Other eBird portals are not suitable for submitting atlas data. If you had at least one breeding code during a visit, submit the entire checklist to the atlas portal. (If you had no breeding codes during a visit, use the traditional eBird site (https://ebird.org).
- Make sure you are signed in. Click “Sign in or register as a new user” towards the top left of the screen and enter your username and password. Create an account if needed; it’s simple and does not take long. If you already have an existing eBird account (or one for another Cornell project), definitely use that account for the Atlas eBird portal. This way all of your eBird observations will be stored together for you to review.
- Click the “Submit Observations” button at the top.
- On the next screen, you’ll want to use “Find it on a Map.” Start typing your county name (or block name) slowly and a list of locations will appear. Click on the county name.
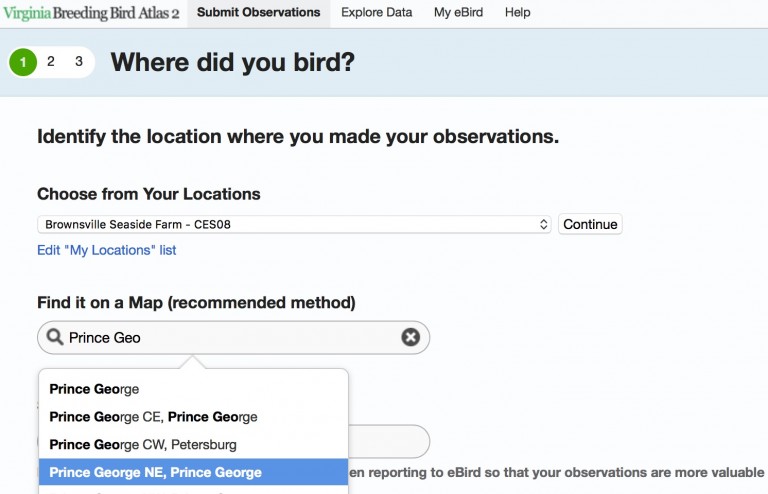
- The map will appear, zoomed into your county. Use the zoom tools on the left hand side of the map to zoom in further (+) or back out (-). The magnifying glass option beneath the zoom scale bar allows you to click and drag a box around your location if you want to zoom in faster. You can click and hold to drag around the map. You may see big red location markers and little blue location markers. Red markers are existing hotspots such as a state park, a national wildlife refuge, or a city park, where people bird often. If you see blue markers, those are for your personal eBird locations that you have previously entered. Note that in the VABBA2 eBird portal the map will show Atlas block lines, including Priority blocks outlined in Red.
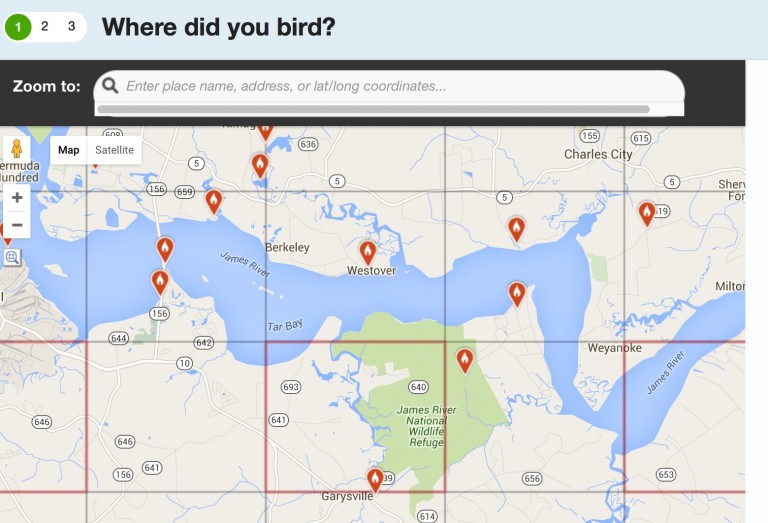
You could select one of the red or blue points as your location by clicking them, but only if it accurately represents where you birded. If you are choosing an existing location, be aware of block lines. Many hotspots are very near block intersections, and it is imperative that sightings go into the correct block. In many cases, you’ll be entering a point that is representative of a route within your block that you covered, in which case you’ll want to plot the point in the middle of where you went. In future tutorials, we’ll talk about how you might want to put multiple checklists within a single block, but for now we’re going to just plot the point right along the river where your eagle nest was spotted. Click the map to plot a location that is representative of your bird sighting.
When plotting your location, don’t forget to zoom in as far as possible. If you are not zoomed in, it’s easy for your point to be substantially off. It’s also helpful to click “Satellite” on the top right of the map to turn on the aerial imagery to help you locate your location.
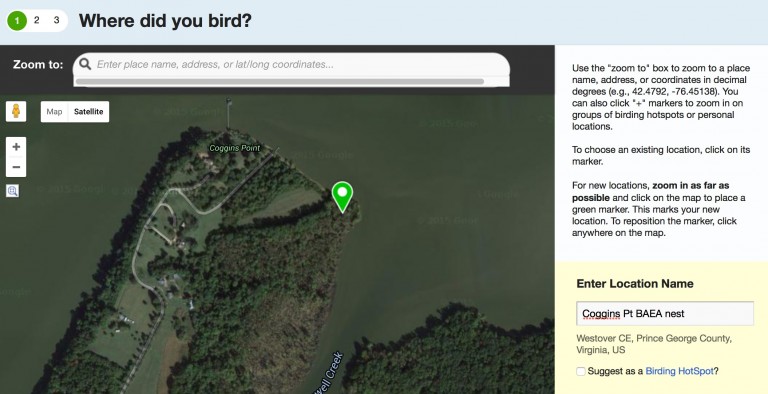
Give your location a name. It can either be preceded by the block name (which can help when selecting locations from a text drop-down next visit) or can just be something that is sensible to you. Then hit “Continue.”
- On the Date and Effort page, enter the date of the observation. Then select your observation type. There are 3 types used while atlasing:
- Traveling, when you traveled a specific distance within an Atlas block – walking a trail, driving a refuge loop, field birding.
- Stationary, when you did not move more than 100 feet during your observation.
- Incidental, when you were not specifically out birding, but you noticed birds you want to report.
Today, we’ll use Incidental, because we just happened to notice this Bald Eagle while motoring past in our fishing boat, but we didn’t record other species or the time and miles we traveled. In general, you should be striving to use the other 2 options when you are out atlasing, as the information on your time and miles spent is very important to record. Select “Continue” and proceed to the next page.
- This is the checklist page. The bird checklist you see is customized for your area and date. You can scroll down to Bald Eagle on the list (or use the Jump to Species box on the right to find it by starting to type “Bald” or the 4-letter code BAEA). There are some additional buttons on the right that can adjust how the checklist is displayed. “Add Species” adds a species that is not on the checklist; “Alphabetic” sorts the species alphabetically; “Show Rarities” adds rare species to the checklist; “Show Subspecies” adds subspecies to the checklist; and “Group by Most Likely” sorts by which species are most likely for that area and date.
Once you’ve found Bald Eagle, enter the number of birds you observed (in our example, 2). Then you need to select a breeding code by clicking “Add Breeding Code or Details”. In this instance, we could use either FL – Recently Fledged Young or ON — Occupied nest. You can read about all the breeding codes for the atlas here. Note that all of these codes are only to be used during the breeding season. You may hear an American Goldfinch singing in February, but because that bird may still be wintering or migrating, you wouldn’t want to code it as “S — Singing male” until you had reason to believe it was on territory. In this case, we’ll use the ON code.
It can be difficult to keep track of when every species breeds, but we have produced a helpful document to guide you called the Breeding Timeline Bar Charts. Keep in mind the bar charts are only meant as general guidance on when to expect species to be breeding. If you see a male-female pair of Scarlet Tanagers hopping around with each other a week before the chart says they should be, feel free to code them as “P — Pair” and include notes on what you saw. Your behavioral observations should trump the chart – the chart is just some general guidance to let you know when species are likely to still be migrating and when lower-level codes should be used with caution. Depending on the kind of spring we are having, dates on that chart could be off by several weeks.
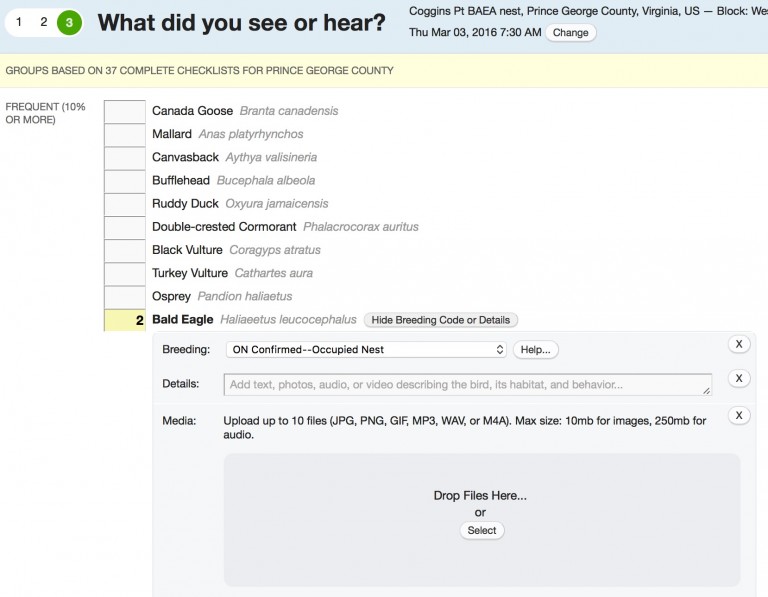
So, once you have entered 2 Bald Eagles with the breeding code ON–Occupied Nest and entered any comments you wish in the Details field (you can also use this field to embed photos), there is one last thing to do. You must answer the question in the lower right, “Are you submitting a complete checklist of all the birds you could identify?”. In this case, we are only submitting the eagle, and did not notice the grackles, herons, or other birds which could have been in the area, so we will click “No” (which is the default on an Incidental checklist anyway).
Then hit Submit!
- When your checklist is submitted, you will see a confirmation screen.
You can review this to make sure the date, location, and other details are correct. If you need to edit any information, click the various Edit buttons. If someone was birding with you and you want to share this checklist with their eBird account, use the “Share w/ Others in Your Party” button. If you want to show this checklist to some friends who were not present, you can copy the URL in the top menu bar (e.g. ebird.org/ebird/atlasva….) and paste it into an email or on Facebook. If you want to submit another checklist for this general location, you can use the options on the right. A link on the top right allows you to access all of your checklists – when viewing this on the atlas portal, this link will only include atlas checklists. If you view this through ebird.org it will include atlas and regular eBird checklists. All submissions to the Atlas eBird portal will find their way into your main eBird account, and will show on maps, lists, and the My eBird tab.
[*This tutorial has been modified with permission from those created by WI Coordinator Nicholas Anich for the WBBAII and we thank him and our sister Atlas for generously sharing these resources with the VABBA2!]
